How to change Signature in GMAIL?

How to change signature in Gmail? With this article we have explained each and every step you need to do to change your Signature or even add new signature in your Gmail Email Account.

How to change signature in Gmail? Steps-by-step

  1. Login to your Gmail Account.
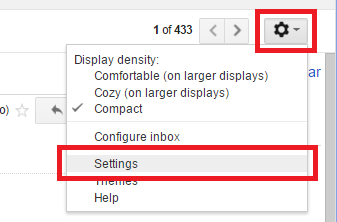
  2. Once you are in your Gmail Mailbox on the top right corner just below your Gmail account picture you’ll see Gmail setting icon. If not able to find it check the image below for reference.
    how to change signature in Gmail
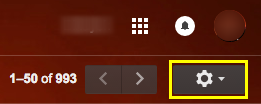
  3. After getting where the Gmail setting icon is click on it.
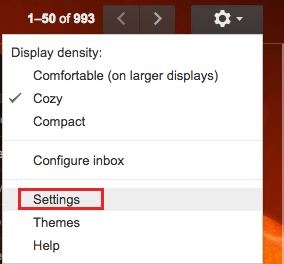
  4. As the drop down menu shows you the options; you’ll have to click on the third last link ‘Settings’
    how to change signature in Gmail
  5. When page loads up you’ll see lots of things you can explore and change in your Gmail Email but you want to know ‘how to change signature in Gmail?’
  6. Now you’ll have scroll down and find it on the same page. Or you can check on the image below for reference.

    how to change signature in Gmail

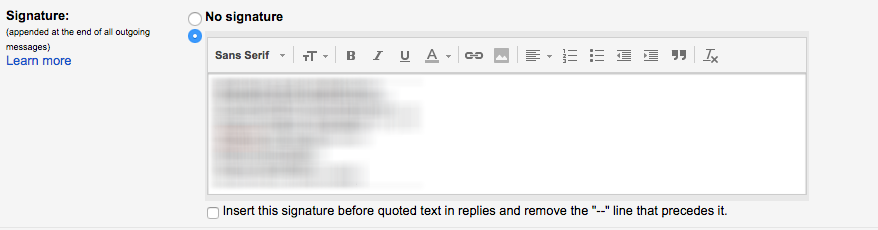
  7. Under this Signature you see the radio bottom is highlighted on ‘No signature’. Now you will have to click on radio bottom right under the ‘no signature’. After that click on it or you just click on the blank space. Type-in your signature and the radio bottom just switches.
  8. Now enter your signature in the blank space.
  9. If you already have your previous signature you’ll see our old signature and you can as well change it.
  10. If you would like to have “Insert this signature before quoted text in replies and remove the “–” line that precedes it.” click on the correction box else leave it as it is.
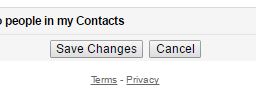
  11. Now to save what you have done on how to change signature in Gmail you’ll need to scroll down and you’ll see ‘Save Changes’ in a very small box.
    how to change signature in Gmail

Hope this article was helpful for your and was useful as well. Please share this to your family and friends. If they also want to add or want to change signature in Gmail.

How to Change Signature in Yahoo Mail or Ymail?

How To Add Signature In Gmail?

We use email service from time to time in order to send messages to our contacts. You type your name at the bottom of the mail to denote that it’s actually you sending the email. Adding a signature in your Gmail can actually make this job a lot easier. When you add a signature in your Gmail, the emails you compose will automatically add the signature you’ve saved at the bottom of your messages. So are you ready to know how to add signature in Gmail? Well, let’s get started.

If you get stuck at any point, please let us know. You can either email us at ‘admin@gmaillogins.com‘ or post a comment below.

How to add signature in Gmail:

Step 1: First of all, open your Gmail account.

  1. Open a web-browser, or a new tab in this browser.
  2. Go to www.gmail.com.
  3. Enter your Gmail email/username.
  4. Click Next.
  5. Enter your Gmail password.
  6. Click on Sign in.
Wait till you’re directed to your inbox page.

Step 2:  Second of all, click on the Gear icon at the top right corner of your Gmail page.

Step 3: Into the extension box, click on ‘Settings’ to open your Gmail settings.How to add signature in Gmail

Step 4: Scroll down to find the signature section in your Gmail settings to add signature in Gmail.

Step 5: Click on the circle below ‘No signature’ or in the input box. You can enter your signature in the space provided.How to add signature in Gmail

Step 6: Type your desired signature.

  • It can be your Name, Address, your favorite tagline, or anything you want to be automatically displayed in your emails.
  • Furthermore, You can also add you email address, Facebook profile, or Twitter account if you like. You will need to copy the link from the address bar in order to do so.
  • Highlight the link you’ve entered and click on the chain icon to make your link clickable.

Step 7: Once you’re done with adding signature, scroll down to the bottom of the page and click on ‘Save Changes’ to save your signature into your Gmail database.How to add signature in Gmail

  • Then, you will then be automatically directed to your inbox page.

Step 8: Click on ‘Compose’.

  • To see that signature is added automatically or not.
  • Type your messages above the underline.
  • The signature you’ve added is now a part of your email.

Step 9: You can also remove your signature in particular messages by simply highlighting the added signature and deleting it.

Step 10: Finally, you can also deactivate your signature by clicking on ‘No signature’ in your Gmail settings page, as in Step 4.

  • Finally, don’t forget to ‘Save Changes’.

We hope how to add signature in Gmail was of any help to you.

Check video on how to add signature in Gmail.